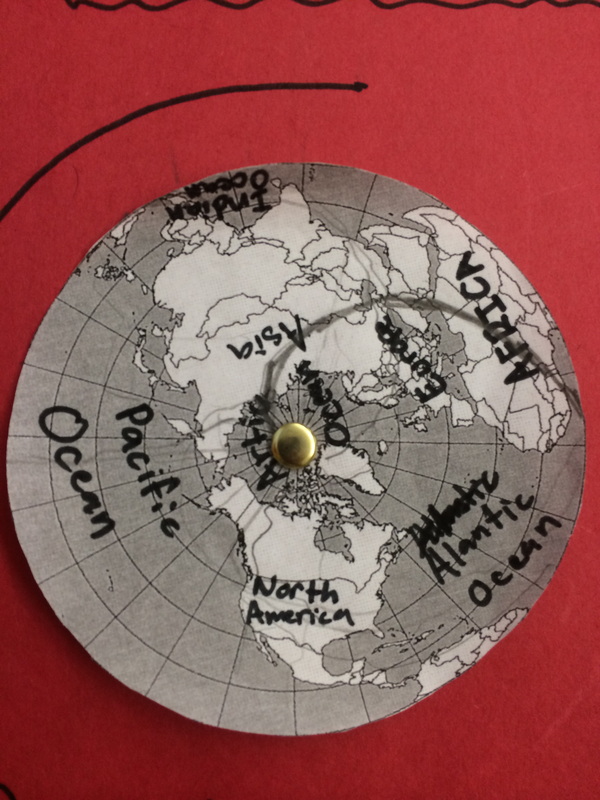
Now that students have learned about local winds, they will learn about the coriolis force which drives global winds and storm systems. To do this, students cut out globes and tacked them to a sheet of paper. When viewed from space, the northern and southern hemispheres rotate counter-clockwise and clockwise, respectively. To simulate this, students will draw lines on the hemispheres while rotating them the appropriate directions. After this, students can see that the coriolis effect deflects wind to the right in the Northern Hemisphere and to the left in the Southern Hemisphere.
Students are learning about local winds through notes, discussions and problems. We relate these to the previous topics of convection and our P.O.E. Here is an example of the problems they have to do. Next up is our weather unit! To begin, students will learn about winds. Students will use their knowledge of temperature, density and freshly learned pressure to understand how global winds form. Today, students completed a P.O.E. (Predict, Observe, Explain) using a convection box demonstration. They also had to draw a diagram showing the movement of air. Here are some pictures of the demonstration! Afterwords, students were assigned a three part class/homework assignment. Students are presented with three images: the convection box from class, a flat image of the earth showing the Equator and North Pole, and a globe. Students are to indicated the hot/cold locations, draw arrows of air movement, and explain why air moves that way.
Next class, students will learn about the Coriolis force and how this causes the wind patterns on Earth.
To finish up the air pressure unit, students had to display their knowledge on either a sheet of paper or a poster. To show off the experiment they designed, students were required to: 1) Draw a picture of their experiment 2) Explain their experimental setup 3) Graph their data 4) Explain and trends or inconsistencies from their graph 5) Explain how temperature and pressure are related To show students fully understood pressure, students had to choose one of the demonstrations from class and 1) Draw a picture of the demonstration 2) Explain the picture in words 3) Explain what is happening. Students had to explain how their experiment helped them understand the demonstration. Below are some examples of student work!! We had 8 different experiments to learn about air pressure! It was pretty exciting and students learned a lot about air pressure. As we all know, scientific fact is not accepted after one experiment, but rather after many scientists repeat similar experiments as well as verify data and results. We modeled this in our class. Students travelled to three groups and looked at their experiment, graph and analysis and wrote down some observations and a question. Specifically, they wrote down one thing they learned from looking at a classmate's graph and they wrote down one thing they learned from looking at a classmate's analysis. They took these with them to help them understand how temperature and pressure are related. Additionally, students left a question to help them see possible sources of error or parts of the experiment to change. Students love to show their classmates all their hard work! This week, students have created and implemented an experiment to collect data to answer the question "How are temperature and pressure related?" Students have measured how much a can crushes when heated then placed in cold water, how much a balloon grows or shrinks when heated or cooled, among other experiments. Check back for their results! Today, students finished their posters and shared them with the class. Here are two examples. As students presented, I noted key academic words and terms. If a word or similar idea was repeated, I added check marks. Students used this list of terms to develop a definition of air pressure individually, as a group and eventually as a class.
To introduce air pressure, students watched two videos: one of a 55 gallon barrel being crushed and a train car being crushed. These are crushed just by the air! In groups, students are tasked with picking a video, drawing a picture of the video and explaining to the class what they think the physical mechanisms are. We will note any key words and terms they use. Check back for their posters and a list of words! To learn about the Earth's layers, students created foldables. To create these, students colored the four layers of the Earth (crust, mantle, inner core and outer core), and labeled them. After learning about what the composition and states of matter were in each layer, students answered two questions: 1) How does matter move in this layer? and 2) What physical mechanisms cause this? I helped them with the inner core, and the students determined the rest of the answers in groups.
For the week of 1/27/14, our Earth Science class engaged in making concept maps in their groups to review Heat, Density and Temperature. This was their first time working with concept maps, and they came up with great work! Students were working with the words: Density, Hot, Cold, Heat, Conduction, Convection, Radiation, Temperature, Transfer, Fluid, Celsius, Energy and Molecules. Students generated their own connections between terms and ideas. After students created their concept maps, they gave each other feedback. Feedback was facilitated through the use of colored sticky notes. The red sticky note was for asking a question, the blue sticky note was for suggesting a revision, and the yellow sticky note was for suggesting an addition. Groups circulated to three other groups and left one sticky note of each color. Afterwards, students read the feedback and made changes, if desired. |
Archives
April 2014
Categories
All
|